

Overview
Intel NUCs are reliable, powerful, and compact solutions that can be excellent solutions for appliances such as VoIP PBXs. They do, however, require some tweaks to get them to function right for something like Asterisk or FreePBX. Here are the steps to go through when setting up the Intel NUC BOXNUC6CAYH to run FreePBX:
Step 1
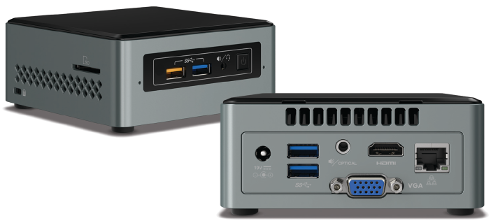
If you’re setting up bare bones Intel NUC such as the BOXNUC6CAYH you’ll need to install memory and a hard drive to get it to boot up. After installing the RAM and SSD hard drive, plug in: power, an Ethernet LAN cable, HDMI monitor, and a USB keyboard/mouse. Now power it up!
Step 2
Now that you’ve powered it up, make sure the BIOS is up to date. Some older versions of the BIOS won’t even install Sangoma’s FreePBX correctly. The BIOS updating process is well documented, so we won’t go into it in this post, but BIOS / Firmware updates for the BOXNUC6CAYH can be found here. As of 12/17/2019, the current BIOS version was A0066.
Step 3
After you’ve updated the BIOS on the Intel NUC, boot it up and enter the setup screen by pressing “F2” during the boot sequence.
Step 4
Turn on the Advanced settings in the BIOS and go to the “Devices and Peripherals” section. In the “USB” tab of that section turn off the “Portable Device Charging Mode”:
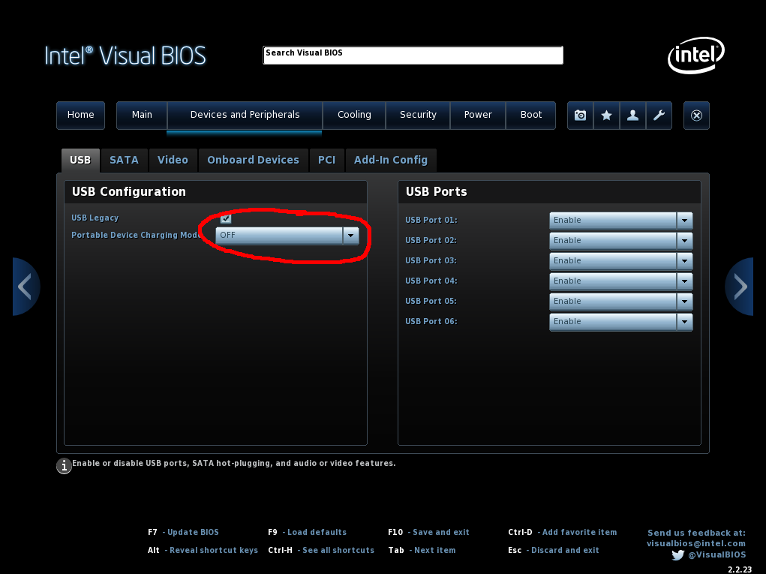
Since this system will be setup as a “server” you won’t need to be charging any USB devices.
Step 5
Now go to the “Power” section and ensure “After Power Failure” is set to “Power On”:
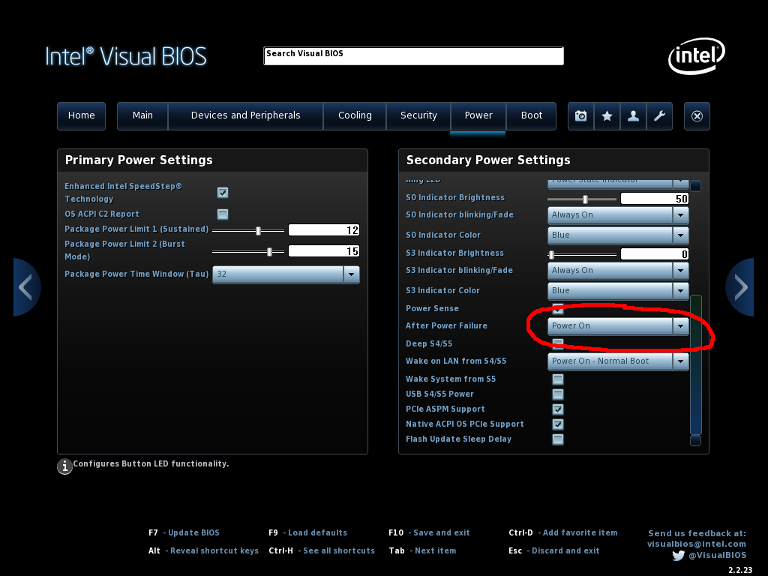
The default settings for After Power Failure will not turn back on the system, so if you have a power outage setting this to “Power On” will ensure the system starts back up as soon as it receives power again.
Step 6
Lastly, go to the “Boot” section and ensure “OS Selection” is set to “Linux” and disable the “Network Boot” option:
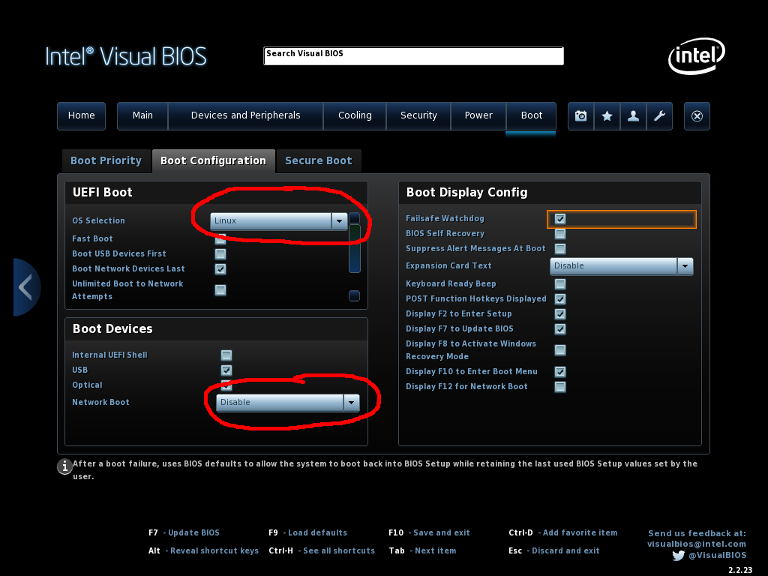
Setting OS Selection to “Linux” will setup up the system so FreePBX and the underlying Sangoma / CentOS operating system will install and boot correctly. If this setting is left on the default of “Windows”, your system may not install correctly and if it does it might take 10-15 minutes just to boot. In addition, always disable the Network Boot option since this system will be functioning as a server.
Your Intel NUC should now be ready to install FreePBX.
Contact Us
Need help setting up your Asterisk / FreePBX on an Intel NUC? Give us a call at 913-440-4940, email us at info@redshiftvoip.com, or fill out our Get a Quote form. Not a DIY kind of person and just want someone else to set one up and ship it to you? Check out our Redshift VOIP SoftPBX Solutions.